Importing Translations
There are three ways to import translations into an app.

Straight to Production (GitHub Workflow)
The workflow will automatically import the translations into the production version of the application which you're trying to update.
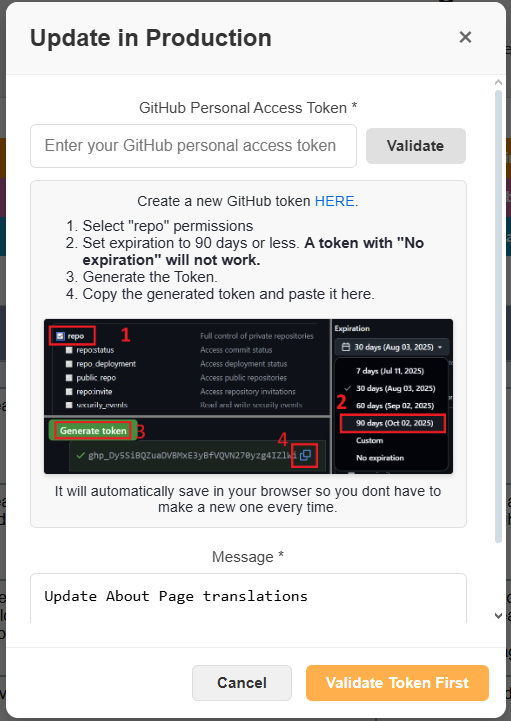
This approach will require you to generate a GitHub Personal Access Token. It also requires the project have an update_translations.yaml file setup. For full setup see Adding a new Project
-
Click on the "Update in Production" button.
-
Follow the steps to create and upload your GitHub Personal Access Token.
-
Press
Update Production. This will trigger a GitHub workflow that will update the translations direclty within the project.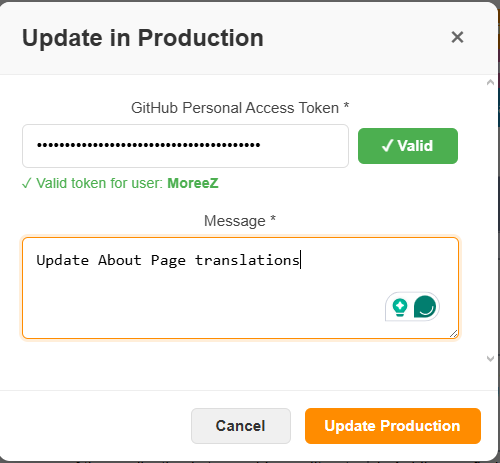
Manual Copy & Paste
-
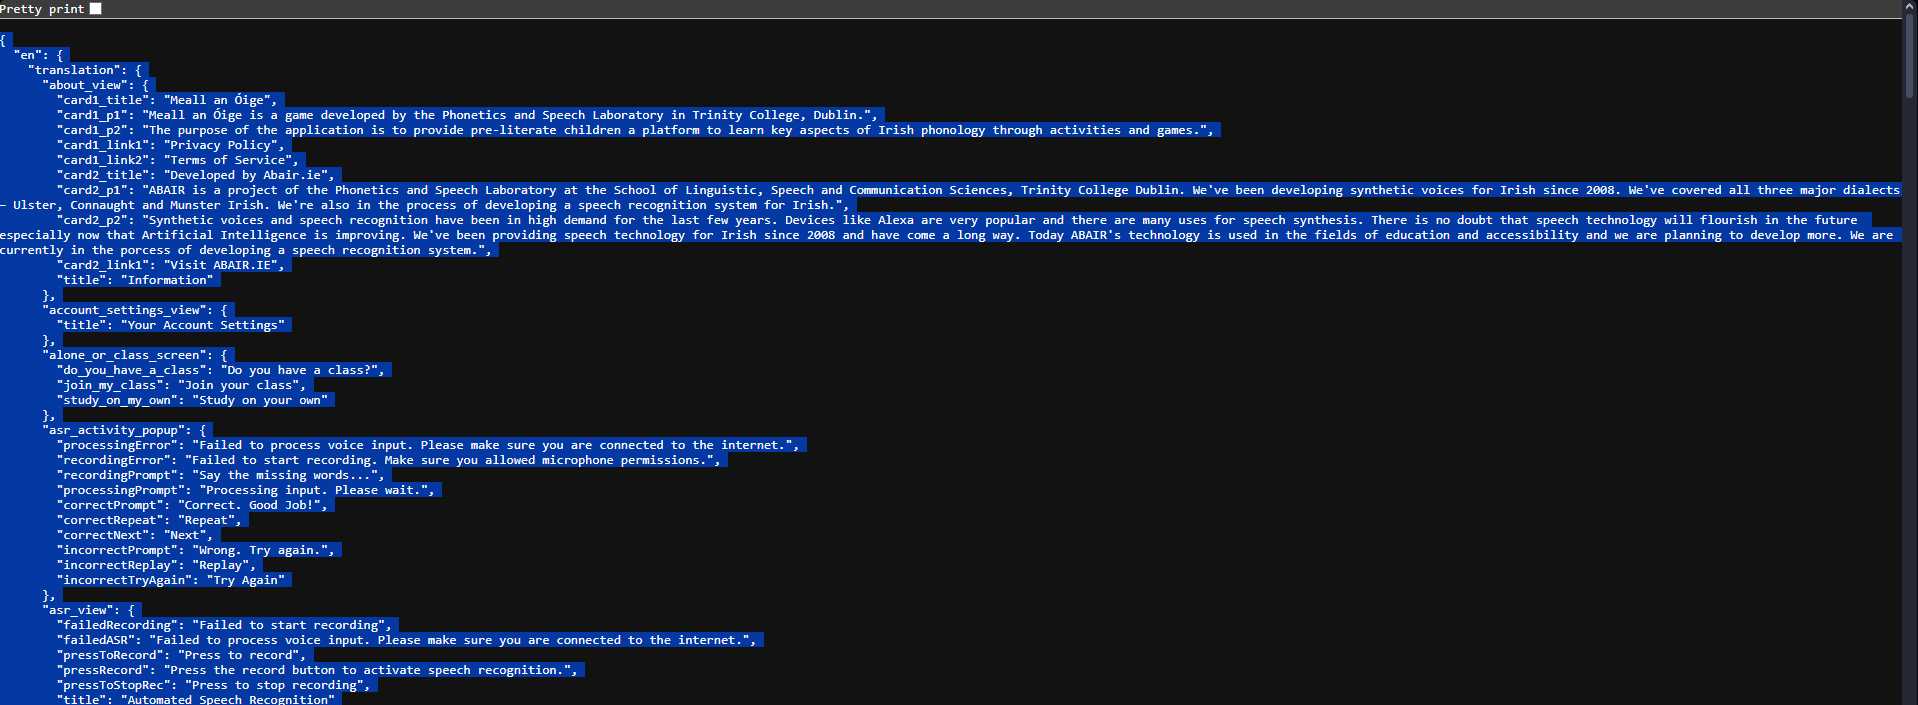
Click the "View JSON in new tab" button to display the formatted translations in a separate tab. (This is not supported on Firefox)
-
Copy the json data using
Ctrl + A(select all) andCtrl + C(copy to clipboard) -
Go to the target project and replace the data using
Ctrl + A(select all) andCtrl + V(paste from clipboard)
Manual Download File Import
The manual approach allows you to generate a JSON file in the Translations Editor client and import it directly into the app you're editing.
-
Click on the "Download JSON File" button to download the translation file.
-
Once the download is complete, locate the downloaded file on your local machine.

-
Make sure to rename the downloaded JSON file to "resources.json"
-
Move the "resources.json" and paste it to the
localesdirectory in the corresponding application. -
The imported translations are now available for use in your app, but for the changes to take effect, you will need to rebuild the app.