User Setup
Setup
Request an admin to create a WireGuard config for you
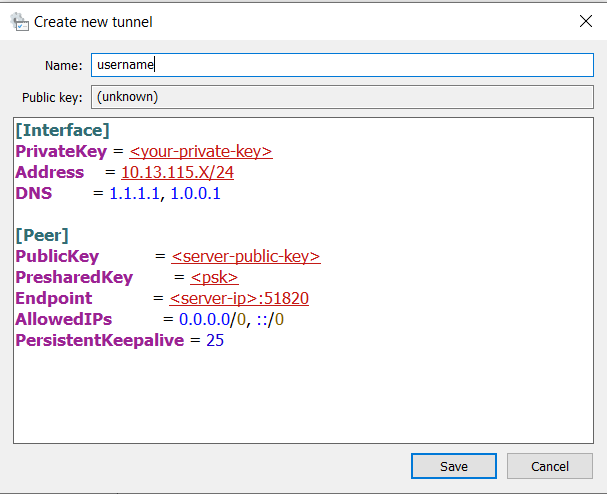
The config file will look like this.
[Interface]
PrivateKey = <your-private-key>
Address    = 10.13.115.X/24
DNS        = 1.1.1.1, 1.0.0.1

[Peer]
PublicKey           = <server-public-key>
PresharedKey        = <psk>
Endpoint            = <server-ip>:51820
AllowedIPs          = 0.0.0.0/0, ::/0
PersistentKeepalive = 25
Install the WireGuard client
Follow the instructions for your OS from the official Wireguard website.
Add the config into the WireGuard client
Create a new empty tunnel at the bottom of the client.

Paste your config into the text box.
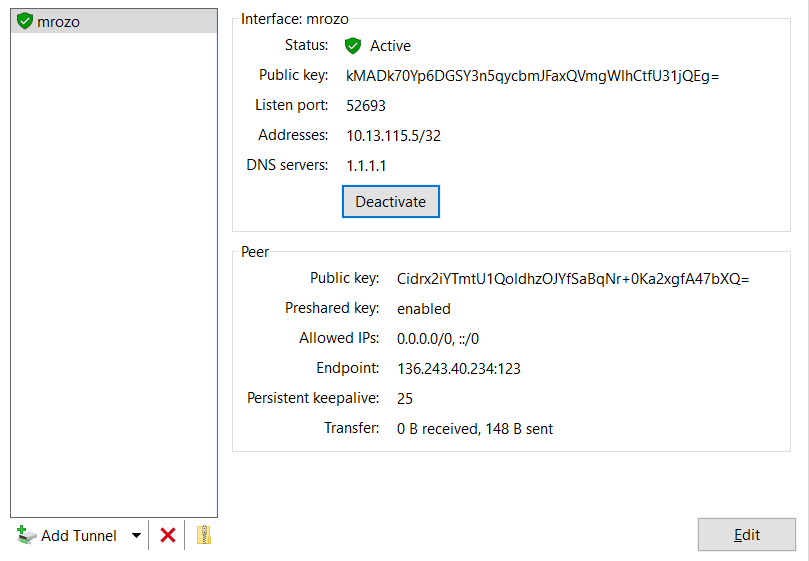
Activate your WireGuard tunnel
You should see it light up in green.
Test the tunnel
With this in place, you should be able to ping the local network gateway.
ping 10.0.0.254
The output should look like this
Pinging 10.0.0.254 with 32 bytes of data:
Reply from 10.0.0.254: bytes=32 time=54ms TTL=63
Reply from 10.0.0.254: bytes=32 time=72ms TTL=63
Reply from 10.0.0.254: bytes=32 time=216ms TTL=63
Reply from 10.0.0.254: bytes=32 time=428ms TTL=63

Ping statistics for 10.0.0.254:
    Packets: Sent = 4, Received = 4, Lost = 0 (0% loss),
Approximate round trip times in milli-seconds:
Minimum = 54ms, Maximum = 428ms, Average = 192ms
⚠️Note
Wireguard uses UDP as its transport protocol. Trinity College restricts all UDP traffic. If the ping is timing out its likely because your Network is blocking UDP traffic.